
Whelping Box Info
As this was my first time breeding a dog, I had at my disposal only the info I got from other breeders and anything I could find online.
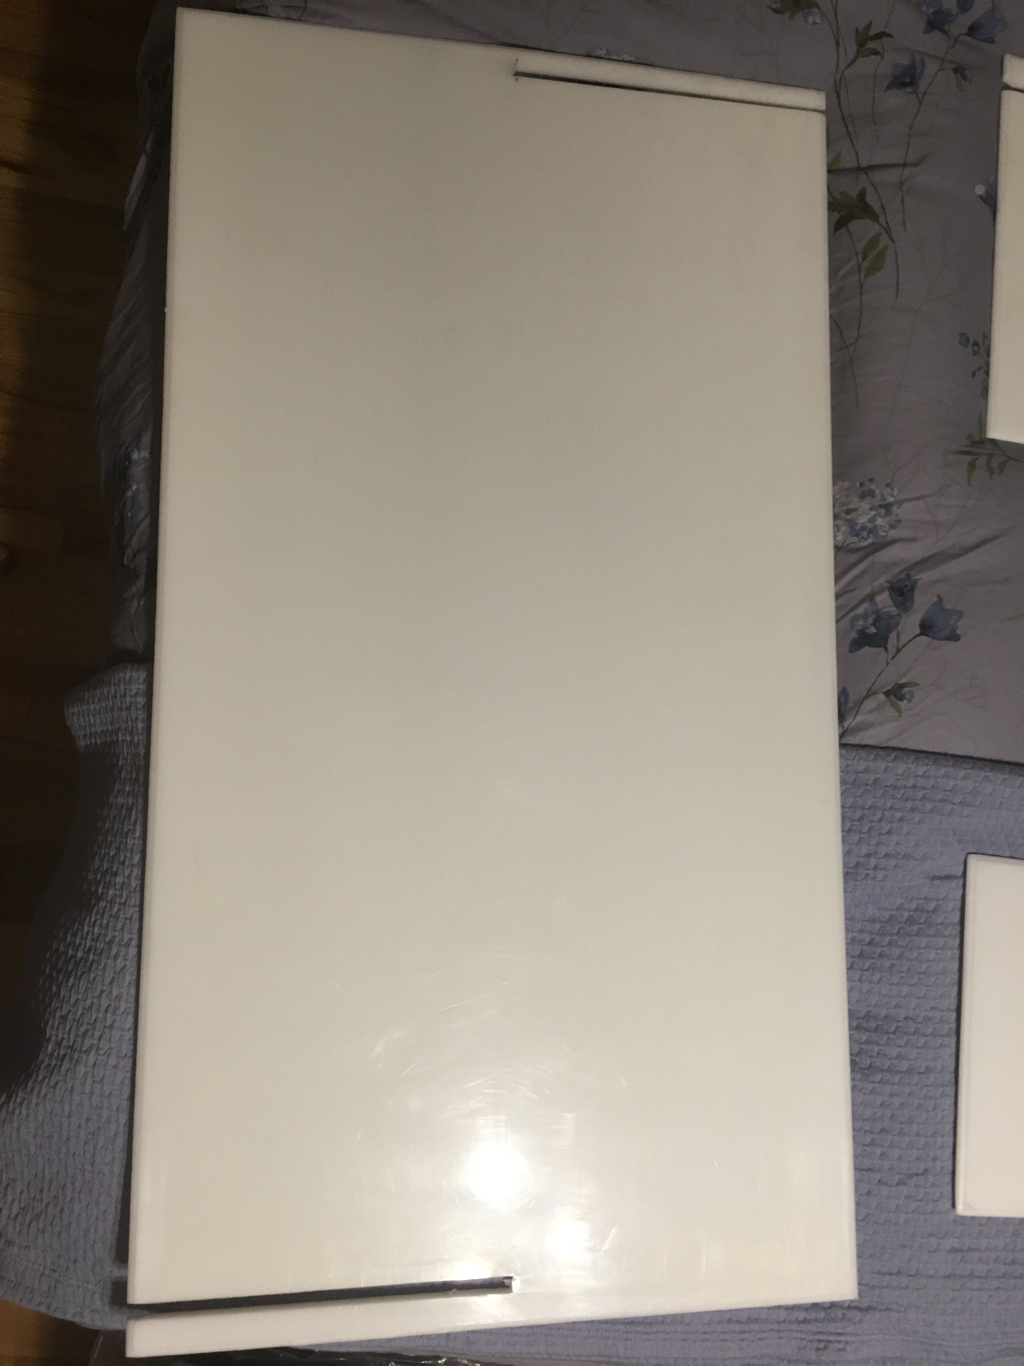
One of my biggest concerns was the whelping box. I wanted to make sure I had one that was well built, but was easily broken down for storage. It also had to be impervious to spills/liquids (apparently puppies are not potty trained at birth and often eliminate in the whelping box).
I automatically eliminated plywood as it will absorb liquids unless you paint/seal it, but these products can be harmful to chewing puppies. I settled on HDPE plastic. This is the same stuff that cutting boards are often made from. It is strong and durable yet moisture-proof. It clan be easily cleaned by wiping it with warm soapy water.
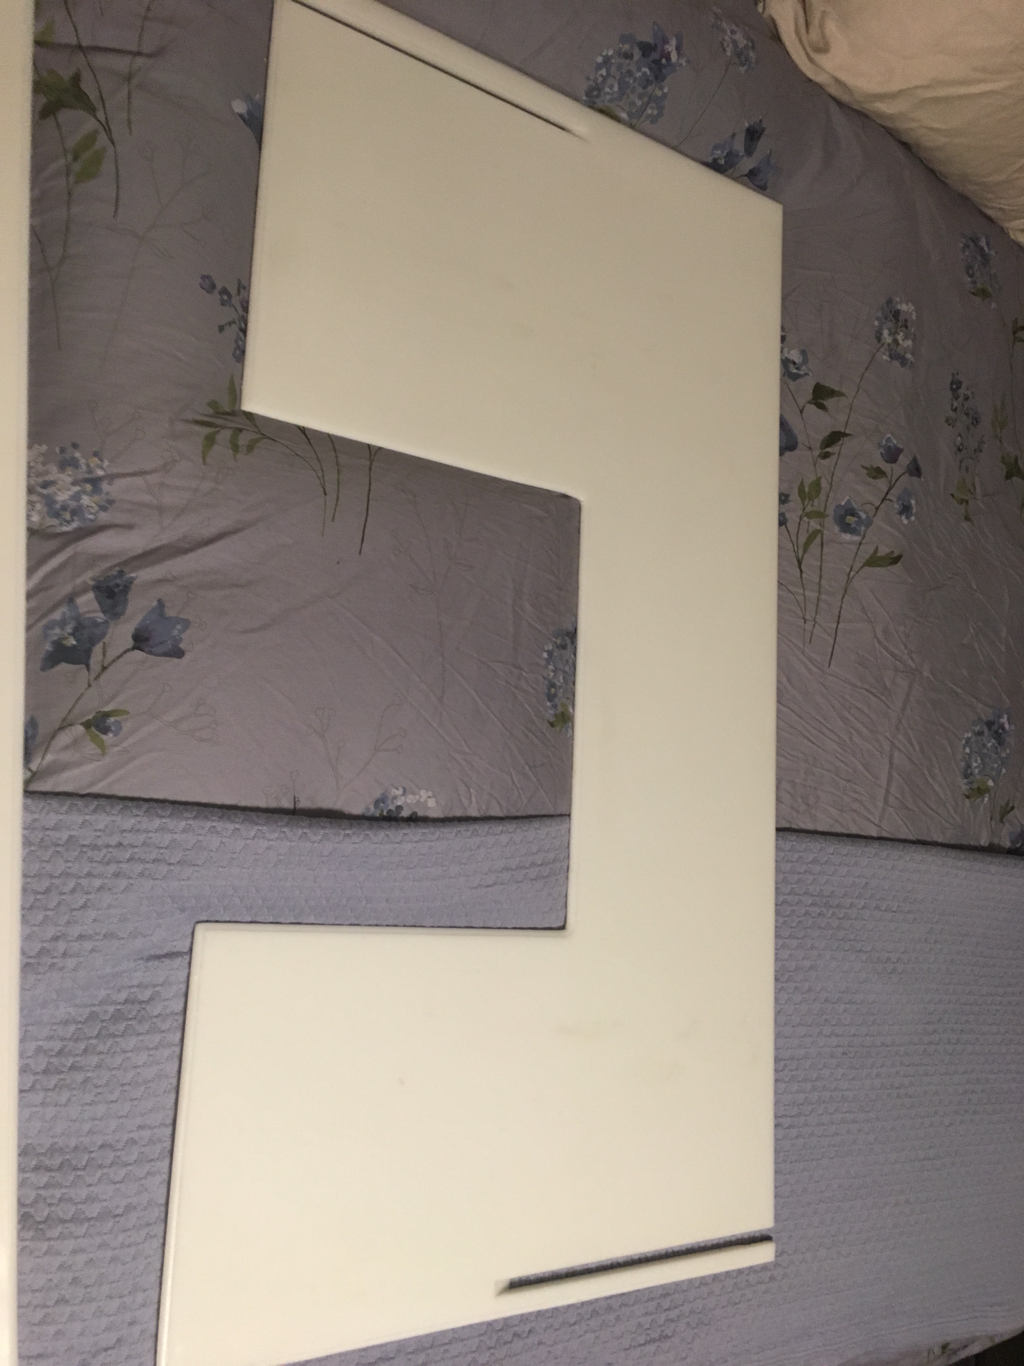
I ended up buying 2 sheets of 1/2" HDPE from a plastics supplier and had them cut 1 into 4 equal 2'x4' sections for the sides. The other was cut into 2 4'x4' pieces for the bottom.
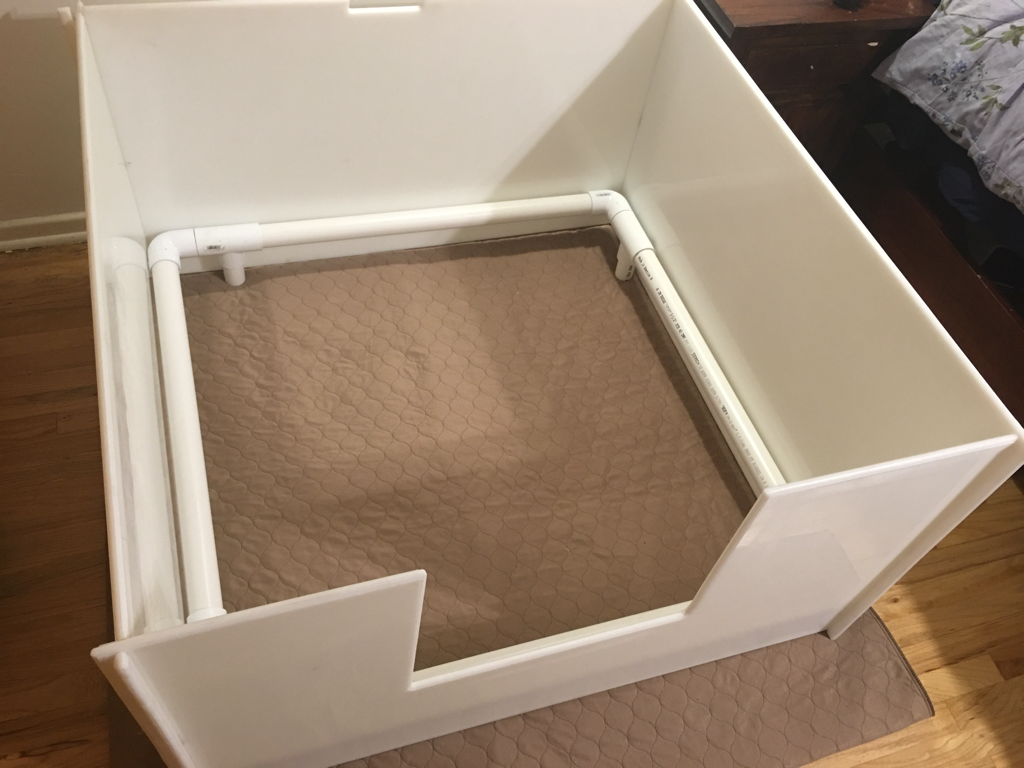
One of the great things about HDPE is that it cuts like butter on a table saw. I used a dado blade to cut a 1/2" slot, 12 long on each end of the 4 sides. The slot was 1" away from the end of each piece. Once all slots are cut, I am able to assemble the side together by slipping them into each other to create a square box. It just sits on top of one of the 4'x4' pieces. No muss, no fuss.
I cut a door that is 12" tall on one of the sides. This allows Tikka to go in and out of the whelping box while preventing the puppies from doing so. I mounted the door on hinges with a clasp to keep it closed when I needed it to be.
The whole process is very simple and easy. I should have reconsidered the thickness of the HDPE as it it very heavy. I should have probably just bought 2 sheets that were 3/8" thick as that would have been plenty strong. Oh well. I now have an extra 4x4 piece that I will turn into some seriously awesome cutting boards.
One of my biggest concerns was the whelping box. I wanted to make sure I had one that was well built, but was easily broken down for storage. It also had to be impervious to spills/liquids (apparently puppies are not potty trained at birth and often eliminate in the whelping box).
I automatically eliminated plywood as it will absorb liquids unless you paint/seal it, but these products can be harmful to chewing puppies. I settled on HDPE plastic. This is the same stuff that cutting boards are often made from. It is strong and durable yet moisture-proof. It clan be easily cleaned by wiping it with warm soapy water.
I ended up buying 2 sheets of 1/2" HDPE from a plastics supplier and had them cut 1 into 4 equal 2'x4' sections for the sides. The other was cut into 2 4'x4' pieces for the bottom.
One of the great things about HDPE is that it cuts like butter on a table saw. I used a dado blade to cut a 1/2" slot, 12 long on each end of the 4 sides. The slot was 1" away from the end of each piece. Once all slots are cut, I am able to assemble the side together by slipping them into each other to create a square box. It just sits on top of one of the 4'x4' pieces. No muss, no fuss.
I cut a door that is 12" tall on one of the sides. This allows Tikka to go in and out of the whelping box while preventing the puppies from doing so. I mounted the door on hinges with a clasp to keep it closed when I needed it to be.
The whole process is very simple and easy. I should have reconsidered the thickness of the HDPE as it it very heavy. I should have probably just bought 2 sheets that were 3/8" thick as that would have been plenty strong. Oh well. I now have an extra 4x4 piece that I will turn into some seriously awesome cutting boards.
Whelping Box Liner
We ended up getting the two different whelping mats.
The Drymate Whelping Box Liner Mat will go underneath everything. It is wider and longer than the box which will help keep it flat to the ground. It has a non-skid, waterproof backing to prevent it from sliding or from puppy accidents staining the hardwood floors.
The EZWhelp Washable Whelping and Puppy Pad will go on top of the liner mat. It will provide some extra cushion for everyone and enough traction to prevent “swimmers legs”.
Heating Pad
Puppies are born without the ability to regulate their internal temperature. As such, they need to be kept warm. Rather than a heat lamp, we have decided to use a heating pad that will lay under part of the whelping box floor. This allows puppies to move away from the heat if they get too warm.
If using a heating pad, you must make sure to get one that does not automatically shut off. These are harder to find than you might think.
Here is is the one we bought.
Sunbeam XpressHeat XL Microplush Heating Pad with Fast-Heat Technology
The heating pad will be put on top of the bottom liner () but under the whelping mat. This will help prevent the puppies from getting too warm. The cord will be fed through a notch I cut in the bottom of the back panel of the whelping box to prevent it from being damaged.
Basic Whelping Supplies
Below is a list of items we kept on hand for whelping and why.
coming soon
coming soon